 how-to
How to Retrofit Battery Storage to Existing Solar
Table of Contents
- What You'll Need Before You Start
- Step 1: Check Compatibility With Your Existing Solar Inverter
- Step 2: Decide Between AC Coupled vs DC Coupled Battery Storage
- Step 3: Size Your Battery and Choose a Chemistry
- Step 4: Understand Solar Battery Installation Costs in the UK
- Step 5: Meet the G98 and G99 Grid Connection Requirements
- Step 6: Installation, Warranties and Long-Term Care
- Step 7: Set Up Monitoring and Smart Home Integration
- Frequently Asked Questions
Last Updated: September 16, 2026
What You'll Need Before You Start
A retrofit battery storage project on an existing solar array is one of the most cost-effective upgrades a homeowner can make, because the panels, mounting and wiring are already in place. At Smarter Utility, we empower homeowners and businesses to transition to sustainable energy with confidence through expert design and professional installation services. The homes that sail through these retrofits are the ones that gathered their paperwork first. Here's what to collect before anyone touches your consumer unit.
Documents and Details to Gather
- Your MCS certificate and the original installation date
- The inverter make, model and rated capacity
- Your MPAN (the supply number on your electricity bill)
- Recent Energy Performance Certificate
- A year of half-hourly smart meter data, if your supplier provides it
- Your current electricity tariff and export rate
That last item matters more than most guides admit: your tariff determines whether stored electricity is worth more at 4pm than at 2am, and it shapes the sizing calculation in Step 3.
Step 1: Check Compatibility With Your Existing Solar Inverter
The first question is whether your inverter can talk to a battery at all. Most string inverters installed before 2018 cannot, and even newer hybrid-ready models sometimes need a firmware update or communications module first.
Check the datasheet for a battery input, a CAN bus port, or explicit manufacturer support for retrofitting battery storage. If none of those appear, you're looking at an inverter upgrade.
When You Need an Inverter Upgrade
You need an upgrade when your inverter has no DC battery input, runs on a discontinued communications protocol, or is already operating above 90% of its rated capacity. Adding a battery to a maxed-out inverter risks clipping and nuisance tripping.
If you're upgrading anyway, a hybrid inverter can often handle both the existing array and the new battery, simplifying wiring and cutting labour cost.
Step 2: Decide Between AC Coupled vs DC Coupled Battery Storage
AC coupled vs DC coupled battery storage is the biggest technical decision in a retrofit battery storage project, determining efficiency, cost and disruption. AC-coupled systems add the battery alongside your existing inverter; DC-coupled systems connect it directly to the array's DC side.
AC-coupled is the standard choice for retrofits. It works with almost any existing inverter, requires no changes to your solar wiring, and lets you add storage without touching a system that's already generating. DC-coupled is more efficient but usually demands a hybrid inverter and a full reconfiguration.
| System Type | Best For | Efficiency | Installation Impact |
|---|---|---|---|
| AC coupled | Retrofits with a working inverter | Lower | Minimal |
| DC coupled | New builds or inverter upgrades | Higher | Significant |
Round-Trip Efficiency and Depth of Discharge Explained
Round-trip efficiency is the percentage of energy that survives a full charge-and-discharge cycle. Depth of discharge (DoD) is how much capacity you can use without shortening the battery's life: a 10 kWh battery at 90% DoD gives 9 kWh usable.
Both figures decide whether a battery pays for itself: high round-trip efficiency and deep DoD deliver more usable kilowatt-hours for the same price.
Step 3: Size Your Battery and Choose a Chemistry
Sizing comes down to your evening and overnight consumption, not total daily usage. Pull your smart meter data, find your average kilowatt-hours between 4pm and 7am, and add a winter margin.
Oversizing is the most common and most expensive mistake. A battery that's too large rarely fills in winter, so you pay for capacity you never cycle.
On chemistry, lithium-ion dominates, and lithium iron phosphate (LiFePO4) is now the default for home storage thanks to its thermal stability and long cycle life. Ask how many cycles each option is rated for and what the warranty says about degradation.
Step 4: Understand Solar Battery Installation Costs in the UK
Solar battery installation costs in the UK depend on three things: usable capacity, whether your existing inverter survives the retrofit, and how much remedial electrical work your consumer unit and cabling need. A straightforward AC-coupled retrofit sits at the lower end; a DC-coupled system with a hybrid inverter and board upgrade sits at the higher end.
As a working guide, most domestic retrofits fall into these bands. These are indicative only, your quote will move with access, cable runs and the battery brand you choose.
Click HERE for your FREE SURVEY today →
| Retrofit scenario | Typical installed cost band |
|---|---|
| Small AC-coupled battery (around 5 kWh usable), existing inverter retained | Lower band |
| Mid-size AC-coupled battery (around 10 kWh usable), existing inverter retained | Middle band |
| Larger battery (13-16 kWh usable) with hybrid inverter upgrade | Upper band |
| DC-coupled conversion with full reconfiguration and board remedial work | Highest band |
Two structural factors push you up a band regardless of battery size.
What a Typical Quote Should Include
- Battery make, model and usable capacity in kWh
- Whether an inverter upgrade is included
- DNO application fees and who submits them
- Electrical remedial work, if your consumer unit needs attention
- Labour, scaffolding and any cable runs
- Warranty terms for the battery, inverter and workmanship
- Estimated commissioning date
The Costs Competitors Leave Out
Most published price guides stop at hardware and labour. The figures that decide your payback sit underneath.
Step 5: Meet the G98 and G99 Grid Connection Requirements
G98 and G99 are the engineering recommendations governing how generation and storage connect to the distribution network, and they are not optional. For a retrofit, the size of the connection decides whether you notify after the fact or seek approval before installing.
What the DNO Approval Process Actually Involves
Your Distribution Network Operator owns the wires in your area, and the application runs through them. The pack your installer submits typically includes:
- The completed application form for the relevant connection type
- A single-line diagram showing the array, inverter, battery and point of connection
- Inverter and battery datasheets, including the protection settings and export limitation capability
- Your MPAN and the site's existing connection details
- Evidence of the installer's competency and registration
Realistic Timelines
Approval timelines vary by operator and connection complexity, and they are the biggest source of project slippage. A straightforward G98 notification can take days; a G99 application on a constrained network can take considerably longer, with some operators requesting reinforcement studies before consenting. Build that wait into your plan and don't order equipment until the DNO gives a clear position.
What Happens If You Skip It
Connecting storage without the correct notification or approval breaches your connection agreement. Consequences include disconnection or remediation at your cost, complications when you sell, and, since the DNO can see export and import patterns at the meter, a reasonable chance of being found out. It is not a formality you can absorb later.
Ofgem guidance on distributed generation and network connections
Step 6: Installation, Warranties and Long-Term Care
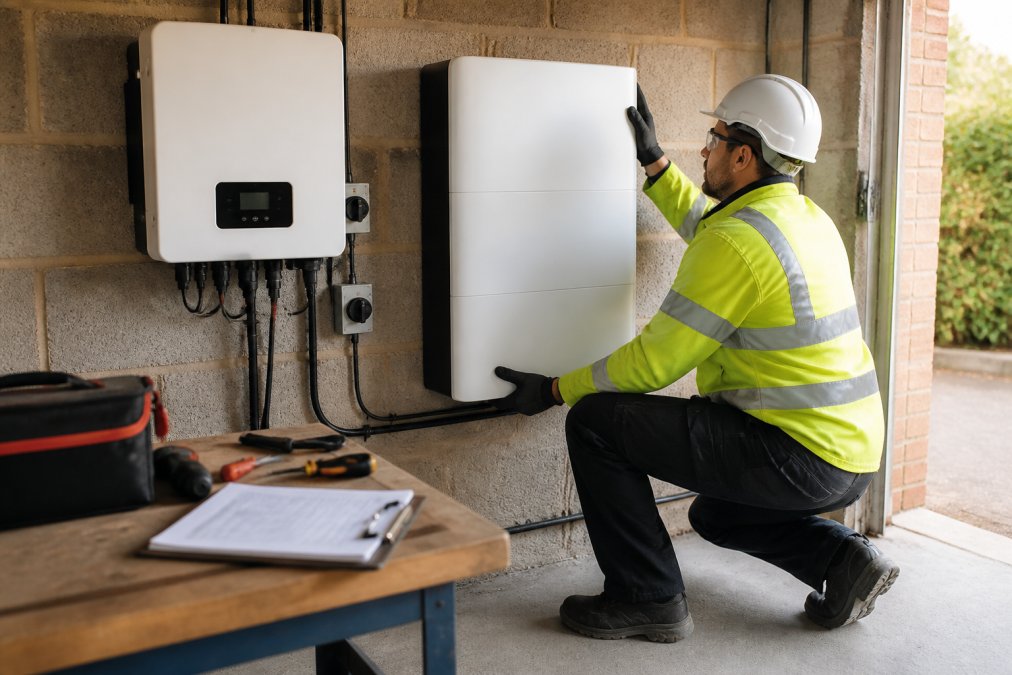
A typical retrofit takes one to two days once approvals are in place. The installer mounts the battery, runs the cabling, commissions the system and walks you through the monitoring app before leaving site.
Impact on Existing Warranty Coverage
Adding a battery can affect your existing solar warranty, the gap most guides skip. Some inverter manufacturers void coverage if third-party equipment is connected without approval. Before committing, check whether your inverter warranty permits the addition and get confirmation in writing.
Maintenance and Long-Term Degradation
Batteries lose capacity over time. A well-specified LiFePO4 unit typically guarantees a percentage of original capacity after a set number of cycles or years, that guarantee is the figure that matters. Ask for it in writing.
Step 7: Set Up Monitoring and Smart Home Integration
Monitoring is where a retrofit stops being a battery and becomes an energy management system. The manufacturer's app shows charge state, solar generation and grid import, but the real value is automation.
Frequently Asked Questions
Can you add battery storage to existing solar panels?
Yes. Most solar PV systems can be retrofitted with battery storage, either AC coupled or DC coupled, without replacing the panels. The deciding factors are your inverter type, its age and whether it supports hybrid operation. An MCS-accredited installer will survey your setup, confirm compatibility and size the battery to your energy storage capacity needs. In many cases the panels stay exactly as they are.
Do I need a new inverter to add a battery to my solar setup?
Not always. AC coupled systems work alongside your existing string inverter, so no replacement is needed. DC coupled retrofits usually require a hybrid inverter, which means replacing the original unit. If your inverter is more than 10 years old or already near capacity, an upgrade is often the sensible option. Your installer should confirm this during the survey before quoting.
How much does it cost to add a battery to an existing solar system?
Solar battery installation costs vary with battery size, chemistry, whether an inverter upgrade is needed and any DNO approval fees. Prices also shift with supply and demand, so no single figure applies to every home. Request an itemised quote that separates the battery, inverter, labour, electrical safety certification and any G98 or G99 application fees.
What are the G98 and G99 grid connection requirements for retrofitting a battery?
G98 covers installations up to 16A per phase and is usually a notify-after-installation process. G99 applies to larger systems and requires approval from your Distribution Network Operator before commissioning. A retrofit battery can push your total export capacity over the G98 threshold, so your installer must assess the combined system, not just the battery. Your DNO application is normally handled as part of the installation.